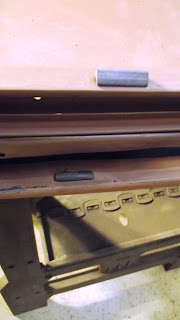
I started with the passenger side since I pretty much knew what was going on with that side. The lower channel I made was missing a bolt and I never tightened the other 3. Once I got that all squared away, it works pretty good. Before installing the glass completely I installed the rubber bumpers onto the door and window garnish molding. These stop the window from rattling ....
Then on to the driver side. This one was a little more difficult as it was catching on something on the regulator. Once I determined where it was hitting and corrected that. It seems to work OK. The regulator on this side is hosed. The shaft to hook the crank handle on is missing some part that encloses it and while turning it, it is chewing up something inside the housing. This regulator will have to be replaced. I don't think anyone is repairing them, but I know you can get them new. When I replaced the rubber bumper on this side I forgot the outer bumpers and did not feel like fighting the window back down just yet, so I left them off. I did install the two on the garnish molding.
After I got the doors back on I removed the upper dash and installed the windshield. I did not bolt the top to the hinge yet. I also did not put the rubber seal on. I just wanted it up there to keep dust out of the inside when I work on the cab.
Then I installed the seat belts. These are old GM lap belts. The rollers are a bit rusty but I shot them with WD-40. Hopefully tomorrow the will break loose so I will be able to adjust the length. I hope to replace these belts later with something a little better looking.
Then I drug the seat out of the attic storage and decided I wanted to try and improve the seat a bit. If you remember the pictures form the last time I worked on it, the bottom cushion kind of bubbled up on the outer edge then swept down in the back.
I cut the hog rings and took the fabric off the seat and all of the cushion. Once that was off I ran a length of flat stock under the springs to stiffen them up. (it still sank too much) Once I secured that in place, I put the cushion back. This time I put the foam I added on first and the original shaped cushion on top. I don't know why I didn't think to do it this way the first time! It looks and sits much better.
Once I go the bottom back in, I installed the back part of the seat. This part is still a bit too long at the bottom. With the added cushion the seat is hard to set straight once you lay it over. If you sit in the truck and push against it with the weight of your body it will go back, but not easily. I think I will pull it back out and cut about an inch, maybe two, off the bottom of the seat. This should be enough to allow the seat to lay over and back without conflicting with the bottom seat cushion. I hope this makes sense ... it's kind of hard to explain.
At any rate the seat is back in and I threw a camel hair blanket on it to see how I liked the color ..... looks pretty good?
I also took the hood off again and installed the radiator support bars ...


No comments:
Post a Comment